

Safely raise the vehicle, release the parking brake, remove the rubber plug on the backing plate, and turn the star-wheel adjuster with a brake spoon until the wheel drags. Back it off until the wheel spins freely with only a light drag, repeat on the other side, pump the pedal, and adjust the parking brake last. Always confirm the exact procedure in your vehicle's service manual.
If your brake pedal sinks lower than it used to, or your parking brake handle pulls up farther every month, your rear drum brakes are probably out of adjustment. The good news: learning how to adjust drum brakes is one of the more approachable brake jobs, and it usually takes under an hour with basic hand tools.
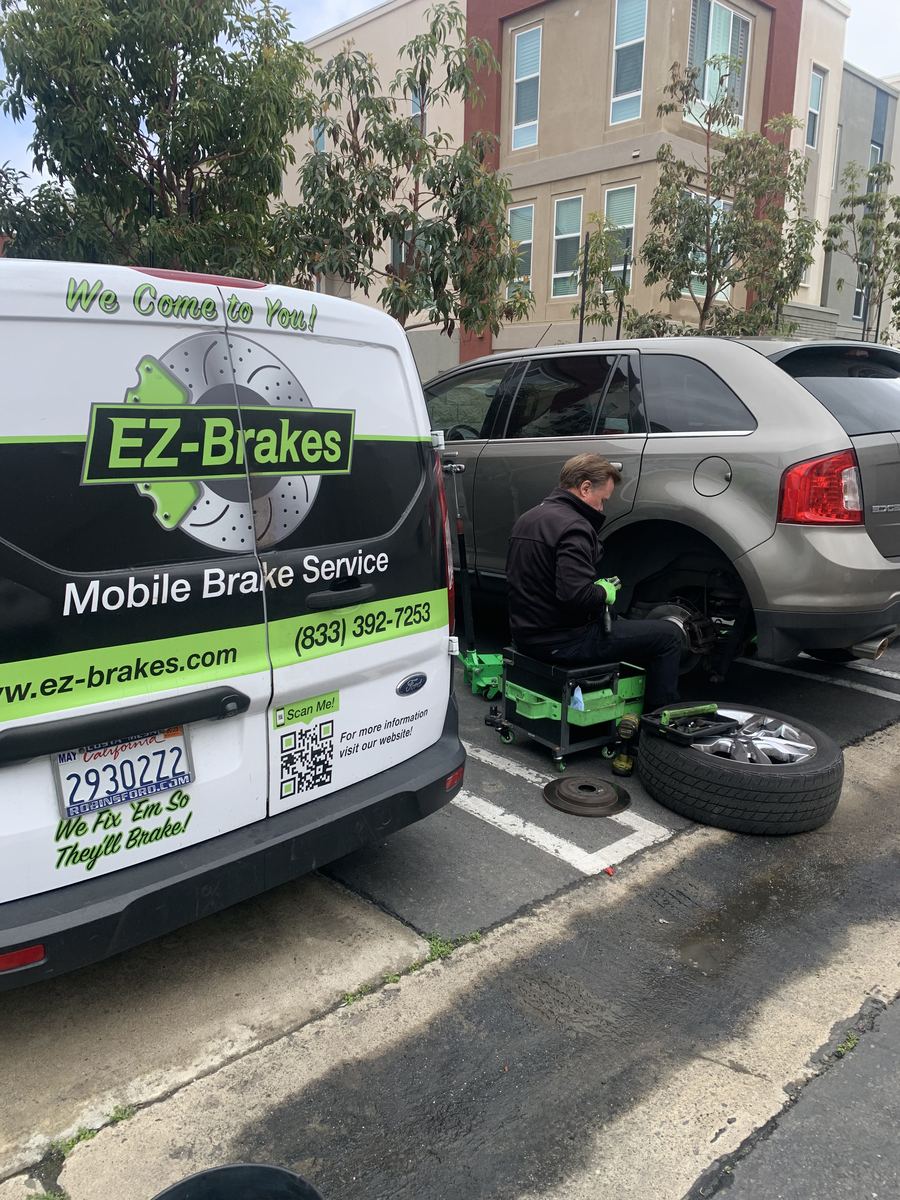
At Ez-Brakes, our mobile technicians have been servicing rear drums on work pickups, family SUVs and commuter sedans across Orange County since 2018, usually right in the customer's driveway. Below, we cover how to adjust drum brakes through the backing plate, how to set them with the drum off, and how to finish with the parking brake and a road test. It's the same sequence we follow on every job, written so you understand exactly what's happening whether you do it yourself or hand it to us.
What Drum Brake Adjustment Actually Does
A drum brake works differently from the disc brakes on your front wheels. Instead of pads squeezing a rotor, two curved brake shoes push outward against the inside of a spinning metal drum. A wheel cylinder, fed by brake fluid, forces the shoes apart when you press the pedal, and return springs pull them back when you let go.
As the friction lining on the shoes wears, the gap between the shoes and the drum grows. When that gap gets too large, the wheel cylinder has to push the shoes farther before they grip, and you feel it as extra pedal travel. When the gap is too small, the shoes drag constantly, which overheats the linings and drum, wears them early and costs you fuel.
Proper drum brake adjustment sets the shoe-to-drum clearance so the shoes sit as close to the drum as possible without dragging. Get it right and you'll notice a higher, firmer pedal, straighter stops and a parking brake that actually holds on a hill.
How Self-Adjusting Drum Brakes Work
Virtually every modern car and light truck with rear drums uses a self-adjusting mechanism. Its heart is the star-wheel adjuster: a threaded screw with a toothed wheel that sits between the two shoes. A spring-loaded lever or cable rests against the star wheel's teeth.
Depending on the design, the self-adjuster turns the star wheel one tooth at a time when you brake firmly while reversing or when you apply the parking brake. Each click spreads the shoes slightly to take up lining wear, so in theory you never touch it.
Why Rear Drum Brakes Drift Out of Adjustment
In real-world driving, self-adjusters often fall behind. These are the causes our technicians run into most:
- Driving habits: In stop-and-go Orange County traffic, many drivers rarely make a firm stop in reverse, so reverse-actuated adjusters seldom cycle.
- Corrosion: Salt air in coastal cities like Huntington Beach and Newport Beach can seize star-wheel threads.
- Worn hardware: Weak return springs, a bent adjuster lever or a stretched cable stop the mechanism from clicking.
- Previous repairs: Shoes replaced without setting initial clearance, or adjusters swapped side to side (left and right units often have opposite threads).
- Unused parking brake: On systems that self-adjust through the parking brake, a lever that's never pulled means no adjustment at all.
That's why knowing how to adjust drum brakes manually still matters, even on a late-model vehicle.
Signs Your Drum Brakes Need Adjusting
Most drivers notice a drum brake adjustment problem through the pedal or the parking brake first. These are the symptoms that point to the rear shoes:
- Low pedal that rises when pumped: Excess shoe-to-drum clearance means extra travel before the brakes bite. Pumping takes up the slack, so the second or third press feels higher.
- Long parking brake travel: The handle or foot pedal goes farther than it used to, or the car creeps on a driveway slope with the brake set.
- Weak rear braking: The front brakes do most of the work, the nose dives hard, and front pads wear faster than expected.
- Dragging or heat: A rear wheel that feels hot after a short drive, a burning smell or a drop in fuel economy usually means shoes adjusted too tight.
- Pulling or early lockup: Uneven adjustment side to side can make the car pull or lock one rear wheel during a hard stop.
For a broader checklist, see our guide to the 5 warning signs you need brake service.
Before You Start: Safety, Tools, and Parts
Brakes are the most important safety system on your vehicle, so preparation matters as much as technique. If you're learning how to adjust drum brakes for the first time, set aside an unhurried hour, work on level concrete, and have the service manual open for your exact year, make and model.

Tools for Drum Brake Adjustment
- Floor jack and two jack stands rated for your vehicle's weight
- Wheel chocks for the front tires
- Lug wrench or breaker bar, plus a torque wrench
- Brake adjusting tool (often called a brake spoon)
- Thin flat screwdriver or a length of stiff wire to hold the self-adjuster lever away
- Flashlight or headlamp
- Brake shoe clearance gauge, if you'll use the drum-off method
- Penetrating oil, brake parts cleaner and a stiff brush
- Nitrile gloves and safety glasses
Brake Dust Safety
Never blow brake dust out with compressed air or dry-brush it. Older shoes and some imported aftermarket linings may contain asbestos, and you can't tell by looking. The U.S. Environmental Protection Agency's best-practice guidance for brake and clutch work recommends that home mechanics use the same dust-control habits as professionals. In practice, that means wetting the assembly before you disturb it, wiping it with damp rags, bagging the waste and washing up before you eat.
When Adjustment Won't Fix the Problem
Adjustment compensates for normal lining wear. It can't repair worn, leaking or damaged parts. Stop and fix the underlying issue first if you find any of these:
- Worn linings: Shoes at or near the minimum thickness in your service manual (commonly around 1/16 inch, or about 1.5 mm).
- Contamination: Wet linings or fluid around the wheel cylinder mean a leak. Oil- or fluid-soaked shoes must be replaced, not adjusted.
- Drum damage: Deep scoring, cracks, a bell-mouthed shape or a drum worn past the maximum diameter cast into it. The machine-or-replace decision follows the same logic we explain in rotor resurfacing vs. replacement.
- Seized or broken hardware: A frozen star wheel, broken return springs or a missing adjuster lever.
- Spongy pedal: A soft pedal that never firms up points to air in the lines or a failing master cylinder, not shoe clearance.
It's also worth entering your VIN in the NHTSA recall lookup before any brake work, since an open brake recall is repaired free at the dealer. In any of these cases, knowing how to adjust drum brakes won't solve the problem until the faulty parts are repaired.
How to Adjust Drum Brakes Step by Step (Through the Backing Plate)
Adjusting through the backing plate is the most common method because the drum stays on. If you only learn one way of how to adjust drum brakes, make it this one. Most vehicles have an access slot in the backing plate; a few put the hole in the face of the drum instead, so check your manual first.
Step 1: Chock, Raise and Support the Vehicle
Park on level ground and chock both front wheels. Lift the rear with a floor jack at the manufacturer's lift point, then set jack stands under the axle or the specified support points and lower the vehicle onto them. Never work under a car held up only by a jack.
On a rear-wheel-drive vehicle, the transmission has to be in neutral so the rear wheels can turn, which makes the front chocks essential.
Step 2: Release the Parking Brake and Spin Each Wheel
Release the parking brake completely; a partly applied brake makes every adjustment wrong. Spin each rear wheel by hand and note how freely it turns. A grinding or metal-on-metal scrape means the linings may be gone, so stop and inspect before going further.
Step 3: Remove the Adjuster Access Plug
Find the rubber plug on the back of the backing plate, usually near the bottom. Pry it out with a small screwdriver. On some vehicles the slot is still sealed by a stamped metal knockout. Remove that only with the drum off, so the slug doesn't fall inside the brake, then cover the hole with a rubber plug.
Step 4: Locate the Star Wheel
Shine a flashlight through the slot until you see the toothed star wheel. Insert the brake spoon so its tip sits on the teeth. You'll use the slot's edge as a pivot to lever the wheel around one tooth at a time.
Step 5: Tighten Until the Wheel Drags
Move the spoon to turn the star wheel several teeth, then spin the tire. If the drag doesn't increase, you're turning the wrong way; left and right adjusters often turn in opposite directions. Keep going until the wheel is difficult to turn by hand.
Tech tip from our crew: If the star wheel won't move at all, don't keep prying. On coastal Orange County vehicles, a seized adjuster usually needs the drum off, cleaning and new hardware.
Step 6: Back Off to a Light Drag
To loosen, slide a thin screwdriver or stiff wire through the slot and push the self-adjuster lever away from the star wheel. While holding it clear, turn the star wheel the opposite way with the spoon. Back off until the wheel spins freely with only a light, even drag; a faint brushing sound is normal.
Some manuals specify an exact number of notches to back off, so follow that figure when it's given. You can tighten without holding the lever because it ratchets, but forcing the wheel backward against the lever will bend or break it.
Step 7: Repeat on the Other Side
Adjust the opposite wheel to the same feel. The most overlooked part of how to adjust drum brakes correctly is matching both sides. Uneven clearance makes the car pull under braking and can lock one rear wheel before the other.
Step 8: Center the Shoes and Recheck
Have a helper press the brake pedal firmly several times. This seats and centers the shoes in the drums. Spin each wheel again, fine-tune if the drag changed, and reinstall the access plugs to keep water and road grit out.
Adjusting Drum Brakes With the Drum Removed (Shoe Gauge Method)
Use the drum-off method after installing new shoes, after machining or replacing drums, or whenever the star wheel is seized. It sets the initial clearance precisely instead of guessing through a slot.
- Remove the drum. Take off the wheel. If the drum catches on a worn ridge, back the adjuster off through the slot first. Free a stuck drum by tapping its face between the studs with a rubber mallet, never by striking the edge.
- Clean the assembly. Wet it down and wipe it as described in the dust safety section above.
- Inspect and lubricate. Check lining thickness, wheel cylinder boots, springs and adjuster threads. Clean the star-wheel threads and apply a thin film of high-temperature brake lubricant, plus a dab on the raised contact pads of the backing plate.
- Measure the drum. Set the inside jaws of a brake shoe clearance gauge to the drum's inner diameter and lock it. Compare the reading with the maximum diameter cast into the drum.
- Transfer to the shoes. Flip the gauge and place its outer jaws over the shoes at their widest point. Turn the star wheel until the linings just touch the jaws.
- Test-fit the drum. It should slide on with a slight drag. If it won't go on, back off one notch; if it slips on loose, snug one notch.
- Fine-tune. Finish through the backing plate as in Steps 5 and 6 above.
We never rely on the self-adjuster to close a large gap after a shoe replacement. It can take many stops to catch up, and the customer drives away with a low pedal in the meantime.
How to Adjust the Parking Brake After Shoe Adjustment
The rule is simple: shoes first, cable second. Any guide on how to adjust drum brakes that skips the parking brake is only half a job, and doing it in the wrong order causes most of the problems we're called to fix.

If you tighten the cable to make up for loose shoes, the cable will hold the shoes partly applied once the clearance is corrected. That causes drag and can stop the self-adjusters from working at all.
- Seat the cables: With the shoes adjusted, apply and release the parking brake a few times.
- Find the adjuster: It's usually a threaded rod at the cable equalizer under the car, or a nut at the lever inside the console. Your manual shows which.
- Set the tension: Tighten until the brake holds firmly within the lever travel or number of clicks your manual specifies.
- Confirm release: With the lever down, both rear wheels must spin freely with no added drag, and the brake warning light must go out.
Rear discs with a drum parking brake: Many vehicles with rear disc brakes hide a small drum brake inside the rotor's center hat for the parking brake. It has its own star-wheel adjuster and is set the same way, usually through a hole in the rotor face.
Testing Your Work: Pedal Feel, Parking Brake, and Road Test
The final part of how to adjust drum brakes is proving the result on the road. Lower the vehicle, torque the lug nuts to specification in a star pattern, and then run through these checks:
- Pedal check: With the engine running, the pedal should feel firm and high, and it shouldn't slowly sink under steady pressure.
- Parking brake check: Set the brake on a gentle slope. The vehicle should hold without rolling.
- Low-speed stops: In an empty lot, make several gentle stops, then a few firmer ones. The car should stop straight with no pull or noise.
- Reverse stops: If your system self-adjusts in reverse, make a few firm stops while backing up to cycle the mechanism.
- Heat check: After a short drive, hold your hand near each rear wheel center without touching the drum. One side much hotter than the other means it's dragging.
Recheck pedal height after the first week of normal driving. If it has dropped again, the self-adjusters aren't working and the hardware needs attention.
Common Drum Brake Adjustment Mistakes Our Technicians See
Most failed attempts at how to adjust drum brakes come down to the same handful of errors. Avoid these and you're ahead of most DIY jobs we're called in to correct:
- Adjusting with the parking brake on. Even a partly applied brake throws off every reading.
- Tightening the cable to fix a low pedal. The pedal problem is shoe clearance; the cable only masks it and adds drag later.
- Going too tight for a firmer pedal. Dragging shoes glaze, overheat the drums and wear out early.
- Forcing the star wheel backward. Without holding the self-adjuster lever away, you'll bend or break it.
- Swapping left and right adjusters. With opposite threads, a swapped adjuster loosens itself every time it clicks.
- Adjusting only one side. Unequal clearance causes pulling and early rear lockup.
- Ignoring a damp wheel cylinder. A small weep today becomes soaked shoes and a failed brake later.
- Skipping the lubricant. Dry star-wheel threads seize again within months, especially near the coast.
DIY or Call a Pro? When to Book Mobile Drum Brake Service
Adjusting your own drum brakes is reasonable if you have proper jack stands and the service manual, the star wheel turns freely, and the shoes, drums and wheel cylinders are in good shape. It's time to call a professional when:

- The adjuster is seized or the hardware is broken
- You find fluid at a wheel cylinder or contaminated linings
- The shoes or drums are worn past specification
- The pedal is still low or spongy after adjustment
- A brake or ABS warning light is on
- You don't have safe lifting equipment or a level place to work
That's where Ez-Brakes comes in. We're a family-owned mobile brake service that started in Irvine in 2018, with technicians who bring more than 50 years of combined experience to your driveway, office parking lot or curbside. We cover the full county; see our Orange County service areas. Every job follows our Green Glove Guarantee: clean hands, clean tools and no mess left behind. Our brake work is backed by a 12-month/12,000-mile warranty.
You don't need to know how to adjust drum brakes to get them done right. Our technician inspects the shoes, drums, wheel cylinders and hardware, adjusts both sides and the parking brake, road-tests the vehicle and shows you what was found. If your front pads are due as well, our brake pad cost guide for Orange County explains typical pricing. If you're weighing a shop visit against a driveway appointment, read mobile mechanic vs. brake shop.
Whoever you hire in California, confirm they're registered with the Bureau of Automotive Repair, the state agency that licenses auto repair dealers.
Ready to book? Call (833) 392-7253 (Mon–Fri 8 am–5 pm, Sat 9 am–12 pm) or request a free quote. We return quotes within 24 hours. See all of our mobile brake services.